
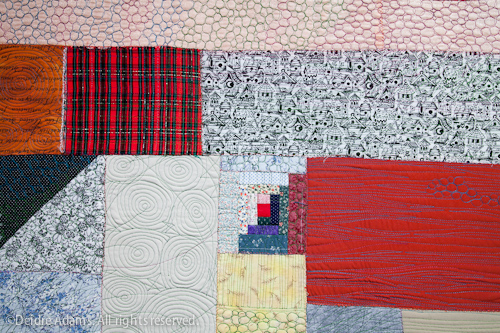
In process photo showing the piece partially quilted. Safety pins remain in the unquilted areas.
Once the quilt top is pieced, the next step is to create another same-size layer of fabric for the backing, either from a single piece of fabric (ideal, in my mind) or stitched together from multiple pieces if needed (as in this case). Then batting is chosen to go in between these two. I like to use wool batting because it’s very easy to handle and has the right amount of loft (puffiness) for the texture effects I want. I bought a 25-yard roll of Hobbs Heirloom wool batting a couple of years ago, which was great because it lasted quite a while, but it’s getting down near the end after this particular project.
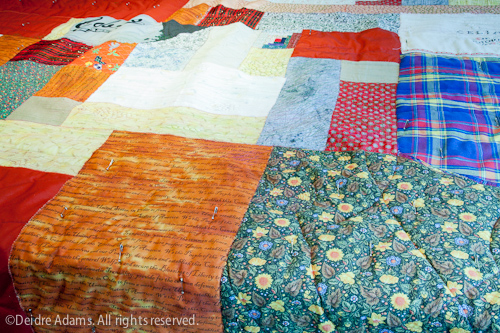
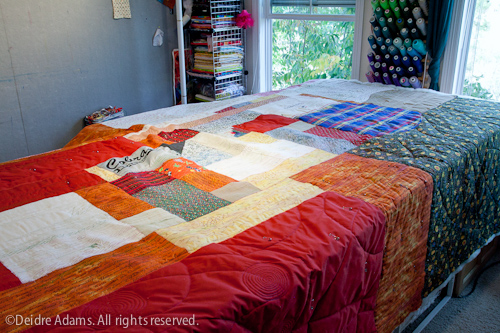
The three layers must then be basted together. The traditional method is to use needle & thread, creating a network of very long stitches, while more modern methods involve special tacking guns or adhesive sprays. The goal is just to hold the layers together temporarily so they don’t shift during the stitching. My preferred method is to use safety pins, an admittedly low-tech solution, but I find it quick and easy, and I don’t have to wonder about any chemical side effects. I used to do my basting on the floor, but now I do it on my 4×8-foot studio table – it’s a lot easier on the back. If the piece is larger than the table, I just start at one end, baste that area, then shift the whole thing over and continue. For this 90×90 piece, squaring up the layers was a bit of an issue, so I started with the middle section first so I could have an equal amount hanging over both edges of the table and I could see that the layers were lined up properly.
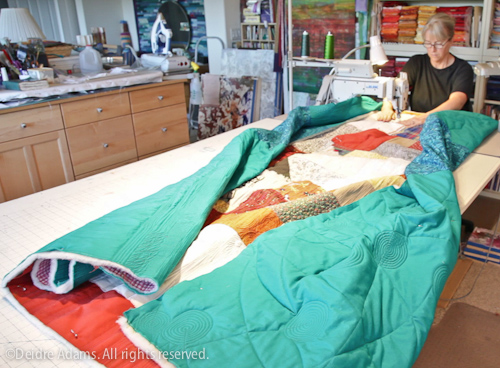 After basting, I can get down to the business of one of my favorite parts of the process: the quilting. This large beast was by far the biggest challenge I’ve had as far as quilting. I had originally thought about creating it in sections, but I decided I didn’t want any interruptions in the continuation of the quilting lines, so I had to just struggle with it at full size. Because of my machine & table setup, I was able to do it by rolling & re-rolling periodically to get to all the areas as needed, but it was a strain on the shoulders to wrestle with it so much.
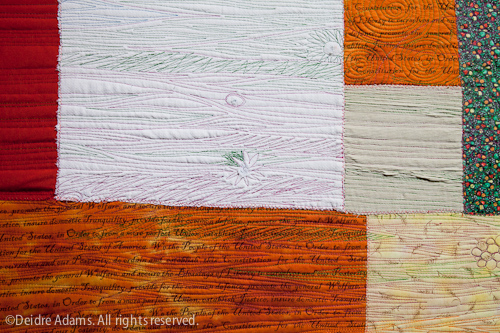
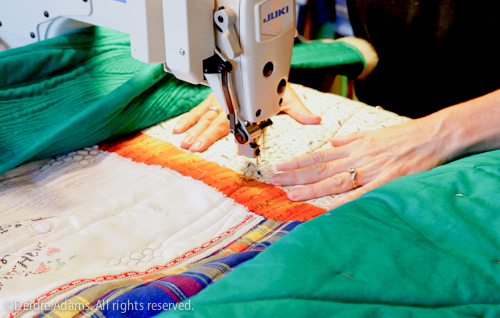 My quilting process is called free-motion stitching. This just means that the fabric is guided entirely by one’s hands, and not by the normal forward motion of the machine. There is disagreement on whether feed dogs need to be disengaged or otherwise rendered inoperable – on my Bernina, I keep them up, and on the Juki, they’ve just been removed entirely – so I can say from experience that either works. The key is to have a darning foot which doesn’t press down on the fabric the way a standard sewing foot does. There are also some gadgets you can buy to help with guiding the quilt as you stitch, like gloves with grippy dots or foam-backed “steering wheels” or blocks, but I’ve found just using my hands alone to be the easiest.
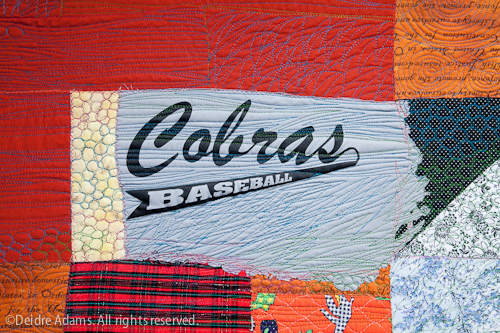
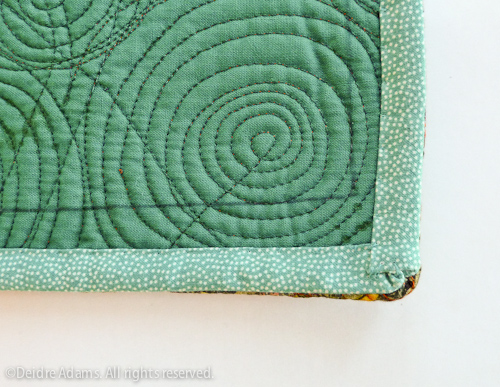
If you’re looking for beauty in the quilting, you definitely won’t find it in my work. I’m using stitching to add texture to a piece, and I’m aiming for a more rough aesthetic. While I’m working, I’m thinking always about the transformative effects of time and weather and how to express that in my art.
Immediately after stitching, the piece is quite misshapen – a mass of hills and valleys, stretched out of shape in many places.
To remedy this problem, the quilt must be “blocked.” My blocking method involves first getting the piece wet – a rinse and a good spin in the washing machine. Then, while still damp, I pin it to my design wall (described in the last post). I stick in a few pins near the top just to hold it up, then I start in the middle and flatten it out by smoothing and stretching, adding pins as I go, trying to maintain the straightness of the sections as much as I can. When fully stretched and pinned, I cover it with a wash of very thinned white paint and let that dry.
Once dry, I take it off the wall and trim off the ragged edges to square it off and make it the size of the finished piece plus a small amount extra that will be turned back when I add my binding. For anything larger than my studio table, I do this in my dining room downstairs. First, the floor is scrupulously cleaned. Then I bring down the cutting mat which normally lives on the studio table, and I square up one edge of it to one of the very convenient planks of my wood floor, which help me to keep things straight without extra measuring.
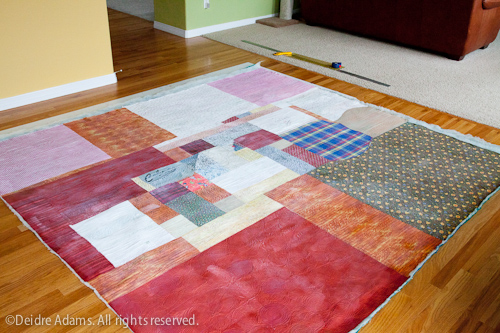
I have a 6-foot metal ruler (from the hardware store) that I line up on top of the quilt and use as a cutting edge for this process.
The next step is to put on the binding. I do “faced” bindings, which means I turn the entire binding around to the back, rather than leave some of it showing from the front, as some quilters do. I use a 1.5-inch strip of fabric, folded in half lengthwise, and stitched to the front of the quilt, 1/4-inch from the edge, with the raw edges together. I use the Bernina machine with a walking foot for this step. The thin wash of paint added during the blocking gives a bit of body and stability to the fabric and helps to keep it from stretching out of shape again while the binding is stitched on.
Then I turn the entire binding to the back at the seam line, and stitch the folded edge to the back of the quilt by hand. There are probably easier ways to do it, but this is how I’ve done it for years now, and I don’t think I could be talked into changing it at this point. It’s secure, and it looks good from front and back, and that’s what I care about.
Next: I finally get to start painting!
fascinating! love knowing your process. now I get to anticipate the next post…
Deidre, I just “discovered” your work on Quilting Arts TV, 700 series. I love your art and the way you are able to manipulate the fabric into very beautiful and unique abstract artwork. I’m looking forward to seeing how you complete this wall hanging. Only wish I could view it in person.
As someone who paints with acrylics on quilts, I’m finding this dissection of process so interesting and informative. I hadn’t thought of putting the facing on at such an early stage but having struggled with stitching through acrylic paint layers I can see the benefits.
Looking forward to seeing how you tackle the painting.
I normally use wide masking tape to secure the piece to a drawing board – intrigued to see how you deal with the edges if facing already in place.
Mags
Thank you all. I truly appreciate your comments!
It’ great that you’re posting your work process, very much appreciated!
Deidre,
Thank you for giving a fascinating and educational look over your shoulder during your process. It inspires me to work really big. I have been contemplating a large piece for SAQA’s show, A Sense of Scale. I have been torn about quilting it in a whole piece or sections. I don’t want the lines of the sections to dictate my design. Simply seeing you tackle it is helping me make up my mind to keep it whole.
I am curious about how your piece is hung. I know wooden slats come in lengths up to 12 feet. Do you use a wooden slat and a sleeve? I’m concerned about it sagging in the middle.
PS. It is also useful for me to know that I can block my work!
Hi, Kathleen. I normally use an aluminum slat. It’s not as thick and doesn’t cause the bulge that a wooden one can sometimes. However, before this piece, I hadn’t done one that was longer than 6 feet. I’m doing a special hanging procedure for this piece that I’ll describe in a future post. Stay tuned!
I am loving this series of posts! Thank you for sharing your process.
Fascinating that you square it up and face it before painting. But is sure makes sense to do that order. Thanks for the great lessons. Nancy