
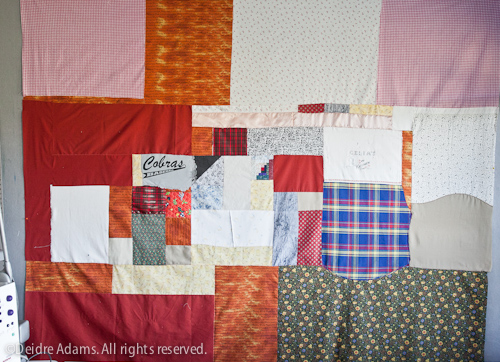
After choosing fabric, the next step is to sew the individual pieces together into a single large piece called the “quilt top” (for any non-quilters who might be reading this). This process is greatly facilitated by having what is known as a “design wall” in one’s studio. In my case, I have one entire wall of my studio which is given over to said design wall. The studio wall was first covered in 8×4-foot sheets of Celotex, an insulation material which is light yet sturdy, and is easy to stick pins into. The insulation boards were then covered with gray felt. I had originally wanted white, but the fabric store didn’t have a sufficiently large amount of white. Not wanting to wait, I bought gray instead, and it ended up being a great choice – it’s less harsh and has a calming, soothing effect in the room. (In fact, I liked it so much, I’ve since painted several walls in my house a nice cool gray). The felt was adhered to the boards with premixed wallpaper paste, a surprisingly easy process.
My design wall is 8 feet high, which was the outside limit of the size of piece I could make without radically altering my life. Practically, though, I needed some maneuvering room at top and bottom, so it ended up with 7.5 feet as the target size. I started with the smaller pieces, positioning them roughly about two thirds of the way up from the bottom, the area where I wanted the greatest amount of visual interest. The surface texture of the felt grabs on to cotton fabrics and lets you keep smaller sized pieces in place without using pins. (After putting lots of pieces together, though, it will eventually become too heavy to stick by itself and will require pins.) My main goal at this point was to fit the pieces together in the most efficient manner with a minimal amount of trim waste – rather like putting together a puzzle.
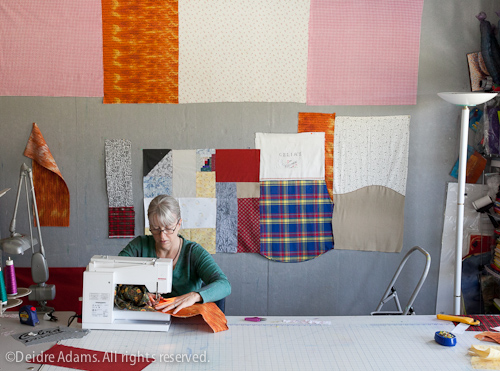
I use an industrial Juki to do all my quilting, but because of modifications made to my machine, it doesn’t work for the piecing process. For one thing, it only does a straight stitch, and I use a narrow zigzag to stitch my top fabrics together. Second, the Juki’s feed dogs have been removed. So I’ve kept my Bernina for piecing and some other purposes.
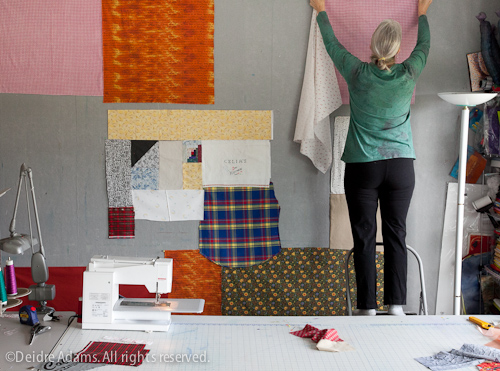
Working on a large piece like this was challenging, but on the upside, I got a lot more exercise than usual because it required a lot of up-and-down on a stepping stool to get to the upper reaches.
The piecing process was completed over the course of a couple of days. Here’s a little stop-action movie I made of this process.
Whew! I am exhausted after watching that video. Love seeing your process.
So now when they ask how long it took to make that, you can say 1:22. (Nice video!)
Gerrie, thanks! Actually, it was way more tiring trying to figure out how to do the video than it was to do the piecing. 🙂
Eileen, ha! I think I will do that next time – it’ll be worth seeing the look on someone’s face!
this is so wonderful to see! loved the video and can’t wait to see the next installment.
I have enjoyed looking at your website and blog. Your work is beautiful. This commissioned piece is stunning!
That was fun to watch and a great representation of how physical the work is. Did you leave the ironing out of the film because it was off camera?
Loved the video!
Love the video–the music is the perfect complement to your work.
Thanks, everyone! Jeanne, the ironing board was out of the picture (somewhat below the bottom of the frame), but you still see me coming close to the camera at times – that’s when I was ironing.
Whew!
This video is great. Our small quilting group has been very inspired by your postings.
Can you explain how you did the stop motion movie?
Thanks!
Elizabeth, I did it by taking individual photos on a regular camera using an intervalometer set to take a shot every 15 or 20 seconds (you can set whatever interval you like). See http://johnrappold.org/photoblog/?p=409. Then I combined these in my video editing software. You can do it with iMovie on Mac, and I’m sure there are equivalents on PC. I’m using Adobe Premiere Elements. I think there are also ways to do it with a video camera automatically, but I haven’t tried that. I did one a couple of years ago by manually starting & stopping the video recording, but it took forever. The still camera method was a lot easier, especially since I was on the other side of it.